Chill Guide Devlog 1

This is a devlog series for Chill Guide, a cross-platform movie and tv show application built with Flutter. In this series, we'll dive into the development process, starting with the project setup and the implementation of the basic routing system.
Introduction
Chill Guide will be a cross-platform movie and tv show application built with Flutter, targeting both iOS and Android platforms. The data for the app will be fetched from the TMDB (The Movie Database) API.
The app's navigation will be handled by a bottom navigation bar, which will feature four main tabs:
- Movies: This tab will display a list of popular movies, allowing users to browse and discover the latest and greatest movies. When a user taps on a movie, they will be navigated to a dedicated details page.
- TV Shows: Similar to the Movies tab, this section will showcase a collection of the popular TV shows.
- Search: Users can use this tab to search for specific movies and TV shows by entering a query.
- Profile: This tab will provide users with access to their personal profile information and settings.
To get started, we'll first set up the project and create the basic routing system.
Project Setup
When starting a new project, it's generally a good idea to customise the static analysis and lint rules to align with your teams's coding style and preferences. Static analysis helps enforce code style consistency, detect potential issues early, and ultimately improve the overall quality and readability of your code.
I have written a blog post that covers the process of configuring static analysis and lint rules for your Flutter projects. You can check it out here: Dart static analysis and lint rules.
With the static analysis and lint rules in place, let's move on to some of the packages we'll be using in this project:
- Routing: We'll be using go_router along with go_router_builder which provides a simple and flexible way for defining and managing type-safe routes.
- State Management: We'll be leveraging the flutter_riverpod package, a robust and scalable state management solution.
- Bottom Navigation Bar: Let's try using the salomon_bottom_bar package.
Routing
In this project, I'll be using the StatefulShellRoute from the go_router package to manage the app's navigation. It allows us to define a stateful nested routing system which is common for apps with a bottom navigation bar. Each tab in the bottom navigation bar is on its own branch and has its own state.
Let's start with a basic routing structure like this:
Main Scaffold with Bottom Navigation Bar
├─ MovieHomePage
│  └─ MovieDetailsPage
├─ TvShowHomePage
│  └─ TvShowDetailsPage
├─ SearchPage
│  └─ SearchResultsPage
│     └─ DetailsPage
└─ ProfilePage
It took me a while to figure out how to set up the transitions between different branches of the StatefulShellRoute. It turns out that setting the pageBuilder property did not have the desired effect.
Luckily, the example code demonstrates how to set up the transitions with the navigatorContainerBuilder property.
Below is how I ended up configuring the basic routing:
The transition between different branches looks smooth and polished.
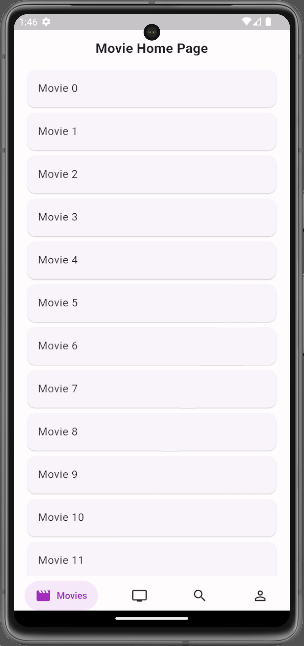
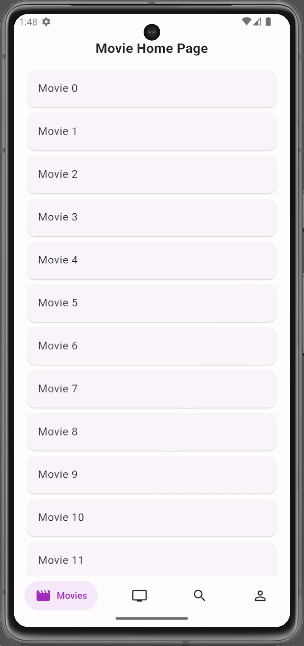
Now that the routing system is set up, I can start implementing the routing for the movie details page. Let's start by creating a ListView of movie cards on the home page.
When working with a ListView that contains a large number of items, it's a good practice to specify either the itemExtent or prototypeItem property. This helps improve the performance of the list view by providing the framework the size of the list items.
In this case, I'm using the prototypeItem property to specify a sample MovieCard.
ListView.builder(
  padding: const EdgeInsets.symmetric(horizontal: 16),
  itemCount: 100,
  prototypeItem: const MovieCard(movieId: 0),
  itemBuilder: (context, index) => MovieCard(movieId: index),
),
I just discovered the itemExtentBuilder property in the ListView widget. This property allows you to specify a function that returns the extent of each item in the list. This can be useful when you want to have items with different extents.
I would like the movie details page to cover the entire screen when navigating from the movie card. To achieve this, we can declare a variable with the special name $parentNavigatorKey in the route data class and assign the root navigator key to it. This tells the go_router to use the root navigator to navigate to the movie details page.
class MovieDetailsRouteData extends GoRouteData {
const MovieDetailsRouteData({
required this.movieId,
});
final int movieId;
static final GlobalKey<NavigatorState> $parentNavigatorKey = _rootNavigatorKey;
Page<void> buildPage(BuildContext context, GoRouterState state) {
return SlideTransitionPage(
pageKey: state.pageKey,
child: MovieDetailsPage(movieId: movieId),
);
}
}
Since we are using the StatefulShellRoute, the state of each branch is preserved when navigating between branches.
UI Overlay Style
I've noticed that the UI overlay style on Android is not consistent with the iOS version. The status bar and the system navigation bar are not transparent.
Let's fix this by setting the SystemUiOverlayStyle with an AnnotatedRegion in the MaterialApp widget. AnnotatedRegion is a widget that applies a value into the layer tree. It's more flexible than using the SystemChrome.setSystemUIOverlayStyle method.
In the MaterialApp.router widget, we can warp the entire app with an AnnotatedRegion widget in the builder property. This way, the SystemUiOverlayStyle will be applied to the entire app.
MaterialApp.router(
  ...
  builder: (context, child) {
    final theme = Theme.of(context);
    final isLightTheme = theme.brightness == Brightness.light;
    final uiOverlayStyle = SystemUiOverlayStyle(
      statusBarColor: Colors.transparent,
      statusBarBrightness: isLightTheme ? Brightness.light : Brightness.dark,
      statusBarIconBrightness: isLightTheme ? Brightness.dark : Brightness.light,
      systemNavigationBarColor: Colors.transparent,
      systemNavigationBarIconBrightness: isLightTheme ? Brightness.dark : Brightness.light,
    );

    return AnnotatedRegion<SystemUiOverlayStyle>(
      value: uiOverlayStyle,
      child: child!,
    );
  },
);
Conclusion
I hope you've enjoyed this devlog. If you'd like to follow along with the project, you're welcome to check out the project's repository on GitHub. Let me know if you want to see more devlogs like this in the future.